Holiday Gift Tags Silhouette Print and Cut

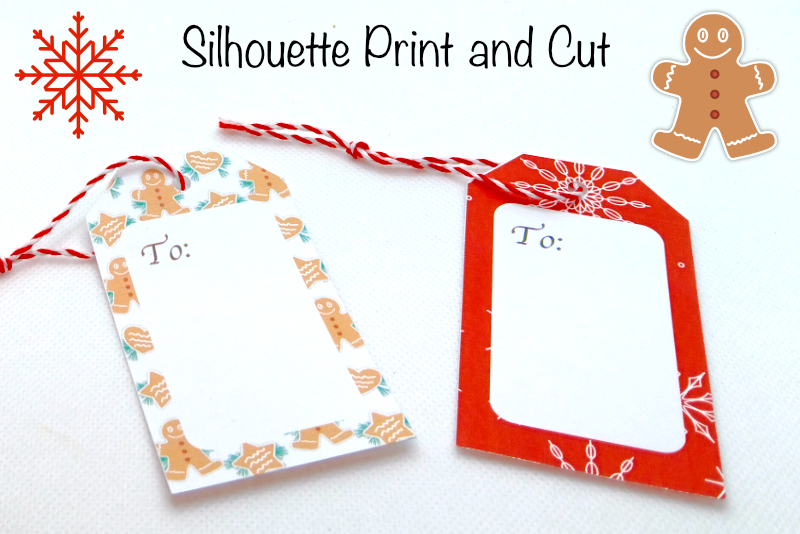
In this Silhouette Studio® tutorial, we will create gift tags for the holidays. Instead of drawing the gift tags, we will use the default gift tag cut line in the New Project Wizard. We will also learn about the Cut by Layer feature.
The New Project Wizard is a nice feature in Silhouette Studio. It contains cut lines for several common projects ranging from gift tags and greeting cards to stippling, stamping and rhinestones. When you choose to start your project with the New Project Wizard, you not only get the cut lines but the workspace is automatically opened and customized with the correct cutting mat and panels needed for your project.
The Silhouette Cameo 5 was supplied to me by Silhouette America.
Silhouette, Silhouette Studio, Silhouette Connect, PixScan, Silhouette CAMEO and Silhouette Portrait are either registered trademarks or trademarks of Silhouette America, Inc. Product screen shot(s) reprinted with permission from Silhouette America®, Inc.
The New Project Wizard is a nice feature in Silhouette Studio. It contains cut lines for several common projects ranging from gift tags and greeting cards to stippling, stamping and rhinestones. When you choose to start your project with the New Project Wizard, you not only get the cut lines but the workspace is automatically opened and customized with the correct cutting mat and panels needed for your project.
- To start our project, click File - New Project Wizard. In the window, choose the Gift Tag option.
- In the Page Setup panel, set the Media Size to Letter (see screenshot).
- Set the Orientation to Portrait by clicking the icon in the Page Setup panel.
- Click the Registration Marks tab at the top of the panel. Set the Registration Marks to On (see screenshot).
- Select the gift tag cut line. In the Transform panel, click the Rotate tab. In the Rotate By section, click the 90 degrees icon (see screenshot).
- Drag the tag cut line to the left edge of the cutting area.
- Duplicate the tag cut line and place it to the right of the previous tag.
- Repeat the previous step to fill the cutting area (see screenshot).
- Select the first tag and open the Fill panel. Click the Fill Pattern tab at the top.
- Select the pattern that you wish to use, to fill the tag with the pattern.
- Repeat the previous step to fill the other tags with patterns.
- In the Layers panel, click the Plus icon at the bottom of the panel, to add a second layer. Name this new layer Layer 2 (see screenshot).
- With the second layer still selected in the Layers panel, draw a 2.5 by 1.5 inches rectangle with the Rounded Rectangle tool over the center of the first tag (see screenshot).
- With the rectangle still selected, set the Fill to white and the Stroke to black.
- With the Text tool, add the text To: to the top of the inside rectangle.
- From the Quick Assess Toolbar, set the Fill and Stroke to Black for the text.
- Select both the inside rectangle and the text. Right-click and choose Group.
- Duplicate the group and place it over the next tag. Repeat for all of the tags.
- All of the groups should be in the second layer. If not, drag them in to the second layer. Only the six original polygons, which are the original tag cut lines, should be on the first layer (see screenshot).
- From the top menu, click File - Print.
- If all looks well in the preview window, send the print job to your printer. Remember that the registration marks must be turned on.
- In the Send panel, open the Layer tab. Turn off the check mark for Layer 2.
- Click the Send button at the bottom of the Send panel.
You will automatically get a 12 x 12 inches cutting mat and one gift tag cut line. Let's reduce the cutting mat to Letter size for the print and cut feature.
The Cutting area is horizontal. Again for print and cut, we need to switch this to portrait.
Now we will duplicate the gift tag cut line several times. We will place the tags over the Letter sized cutting area, omitting the area around the registration marks. But first, we need to rotate the tag.
Next, we will fill the tags with a patten using the Fill Pattern feature. We can fill each tag with a different pattern (see screenshot).
Now we will add a solid rectangle to the front of the tags. But we will need to add a new layer.
Cut by Layer
We will use the Cut by Layer feature to control what is cut by the machine. As we have the original tag cut lines on the first layer and all of the other lines on the second layer, it will be easy to tell the machine to cut the lines on only the first layer.
The Silhouette Cameo 5 was supplied to me by Silhouette America.
Silhouette, Silhouette Studio, Silhouette Connect, PixScan, Silhouette CAMEO and Silhouette Portrait are either registered trademarks or trademarks of Silhouette America, Inc. Product screen shot(s) reprinted with permission from Silhouette America®, Inc.

Related Articles
Editor's Picks Articles
Top Ten Articles
Previous Features
Site Map
Content copyright © 2023 by Diane Cipollo. All rights reserved.
This content was written by Diane Cipollo. If you wish to use this content in any manner, you need written permission. Contact Diane Cipollo for details.


